Introduction to Islamic Wedding Invitation Video Editing
Creating a Muslim or Islamic wedding invitation video is a meaningful and modern way to invite family and friends to celebrate a special union while incorporating cultural and religious traditions. Unlike traditional paper invitations, a video invitation allows you to blend visuals, music, and text in a way that reflects the beauty and significance of an Islamic wedding. With KineMaster, even beginners can produce a professional-looking invitation that hhonoursthe occasion. KineMaster’s user-friendly interface provides multiple layers for videos, images, text, and effects, giving you the freedom to create a personalised and elegant video that communicates all essential wedding details. This tutorial will guide you step by step, helping you craft a polished and memorable wedding invitation video.
Planning Your Islamic Wedding Invitation Concept
Before opening KineMaster, it is important to plan your wedding invitation video concept carefully. Consider the theme and mood you want to convey, whether it is traditional, elegant, or modern with Islamic motifs. Collect high-quality photos or video clips of the bride and groom, pre-wedding events, and culturally significant rituals that reflect Islamic traditions. Prepare all text content, such as the couple’s names, Nikah and Walima dates, venue details, and a warm invitation message for guests. Planning ensures a smooth storytelling flow and makes it easier to arrange clips, text, and music. A well-thought-out concept ensures the final video feels personal, meaningful, and visually appealing.
Setting Up Your Project in KineMaster
Once your concept is ready, open KineMaster and create a new project by choosing the aspect ratio suitable for your sharing platform, such as 16:9 for YouTube or 9:16 for WhatsApp and Instagram stories. Import your photos and video clips into the timeline and arrange them in the desired sequence, starting with an elegant introduction, followed by the couple’s moments, ceremonial highlights, and ending with invitation details. KineMaster allows you to trim clips, reorder layers, and adjust timing easily, ensuring the video flows smoothly. Properly setting up your project at the beginning saves time and helps achieve a professional finish.
Adding Music, Transitions, and Effects
Music plays a vital role in enhancing the emotional impact of an Islamic wedding invitation video. Select a soft, instrumental, or culturally appropriate track that complements the visuals while respecting Islamic traditions. Trim and adjust the volume of the audio to match the video length, ensuring a seamless experience. Smooth transitions between clips, such as fade-ins and dissolves, give the video a polished and elegant flow. You can also add subtle overlays or decorative effects like soft glows or Islamic patterns to enhance the aesthetic without overwhelming the visuals. These elements help make the video visually engaging and culturally respectful.
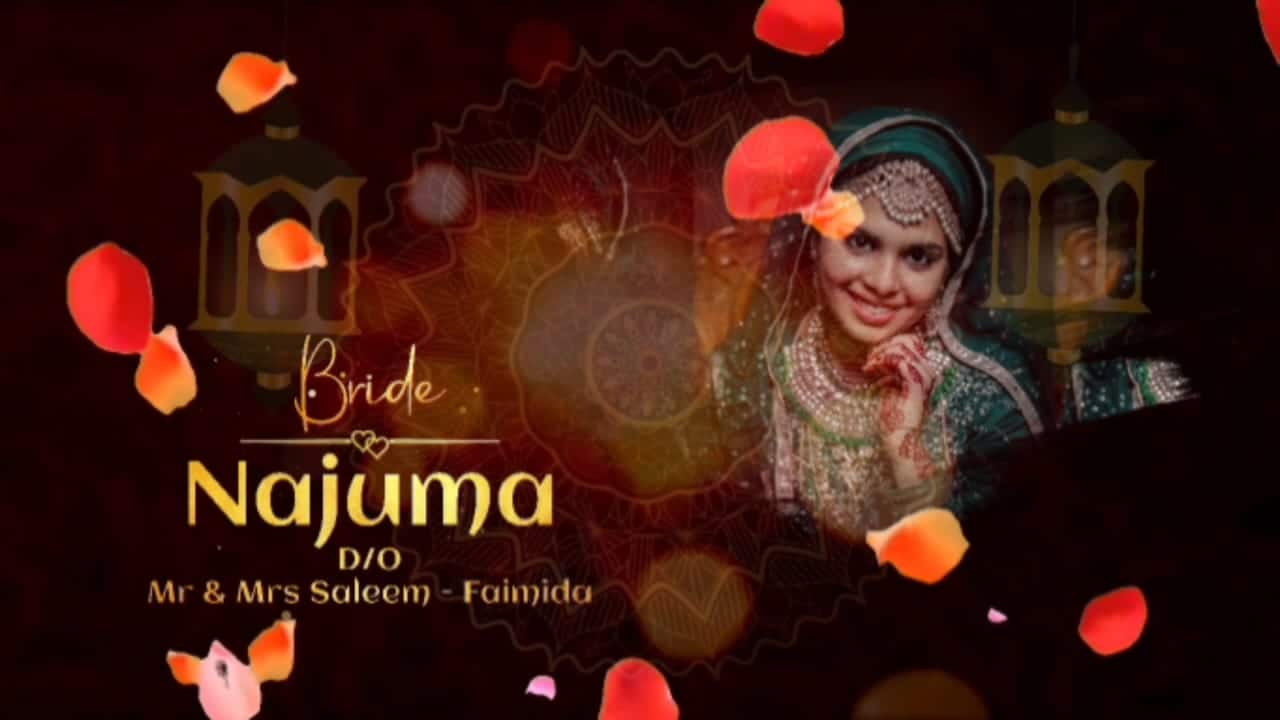
Designing Text and Exporting the Final Video
Text is a crucial element because it communicates all essential information clearly to your guests. Use KineMaster’s text tools to include the bride and groom’s names, Nikah and Walima dates, venue details, and a heartfelt invitation message. Choose fonts, colours, and subtle animations that match the theme and maintain readability. After reviewing the video to ensure accuracy, smooth transitions, and balanced audio, export it in high resolution to retain quality across devices. Once completed, your Muslims or Islamic wedding invitation video will be ready to share with friends and family, creating excitement and anticipation for the joyous occasion.