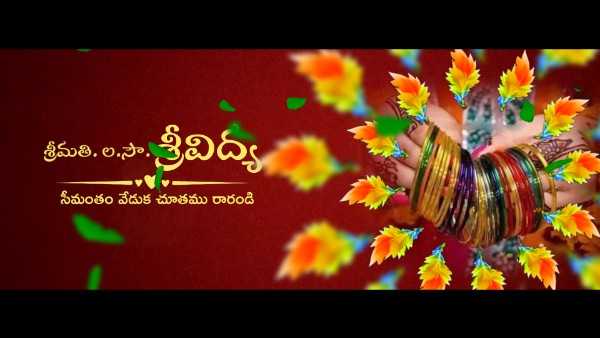
Are you looking for a good Seemantham Ceremony Invitation Video?
- In this article, I will explain to you step by step how to create the best invitation video.
- How to edit professionally is also in the Kine Master app.
First, we need to gather some video-related files.
- All we need for this is a red background along with flower animations a green effect and a golden particle effect along with good background music and if you want to add any extra fix to it then add it.
How to do professional video editing
- There are some tricks you should use for professional video editing. Common mistakes made by many people are not taking quality video, not being able to export in high resolution while exporting, not giving animation at the right time, and not giving in animation or out animation at the same time.
- Also, you should ensure that any media or photos you import are of high quality.
- Also, even after you finish editing the video, if there are still any mistakes, play the video again and check and correct it.
Kinemaster editing
- Even those who know basic editing can easily edit in this Kinemaster. First, you open the Kinemaster application.
- Click on the create button enter the project name and then select the ratio of 16:9 or in full screen or in landscape whatever you are comfortable with then click on the create button now you will be taken directly to the gallery in which you will first create a background video. You have to select, or else you have to select the image as well. It should be red.

- Then you have to add the video or photo that you have taken up to one minute because the invitation comes to us almost from 30 seconds to 60 seconds so you have to apply a duration of up to six seconds for each layer. Now click on the same media and on the right side in the main options click on the layer there is a tool called effects click on it go to Blur Effects select Gas and Blur Effect in Basic Effects then go to Effects Properties and add strength to three or two. Coming back again, if there are some options on the right side, if we scroll down, we will see an option called vignette, we have to enable that option.

- Enabling this option gives us a professional look at the background
How to create titles like a professional
- There are many applications to create these titles, whichever application you are comfortable with, you can edit the applications, if not, you need to edit them in PNG format. But I will tell you how to edit in this application for that you open the Kine master application and select the 16:9 ratio then click on media tool and background take a photo or video click on the same layer and on the right side we have some options scroll down A background tool will appear, click on this background tool and select Transparent.

- Now we have it in transparent so that if you come back again and select the pan and zoom option then you will see the equal to option again then click on it and move that layer right or left now you will see the complete background in transport Now you click on the layer Click on the text tool and add the titles you like and give the correct color to those titles.

- Add the right font to the right divider and make sure it is vertically oriented in the center. Like this, you have to create all the titles as well. After creating in this way view option two will appear on the left click on the option and the capture and save option will appear now if you click on this option the title you have created will be saved in the gallery in PNG format then you have to create all the titles like this.
How to make a photo animation
- To make this photo animation, we have to use default tools. For this, add a photo wherever you want to create a photo, then click on that photo, and on the right side we will see the crop tool. Click on the crop tool and enable it. This feather should be set at 30%, now feather will be applied to the entire circle of this photo. If you want to add this photo anywhere in the center, left or right, after adding, add a six-second lover to this photo as well.

- Now this photo also needs to be edited so that when you click on this photo there are some tools on the right side, among which there is a tool called Transform, there are many options, you can use these options and do it as you like. When you animate, you need to set the animation timing to the correct timing for everything else, this will give your video a professional look.
Adding elements
- When you apply the effects you need to edit the video first complete then add these helmets only during the final touching if you want to apply any golden particle or any green effect for this click on the layer then click on the media and whatever element you want to add Select it and then if you use green helmet you need to enable chroma options for it.

- This chroma option has two options. Use these two options and remove all the greenery completely. Even while adding golden color in these elements, wherever we have added titles, six above them. For seconds, apply this golden particle and click on the same golden particle, we have some tools, on the right side, they have blending tools, use these and set them correctly for the background. You can also add from
Final checks

- After you have completed the entire video, watch the video completely again, if there are any mistakes, do not add anything else, or helmet titles, if there are any mistakes, watch the complete one more time, if the animation is different or if the animation timing is missing, then you have to check everything completely and then start the export and finally. After the video is complete, you need to use a tool for a professional look, it will come with cinematic frames, we have it in the Kine master store, install it, add it to the directory, and add it to 60 seconds, this video will be complete.
If there are any doubts about this article then in the comment section