Hello friends, welcome to Srikanth Digital Works. In this article, I will explain step by step how to create a New Year photo editing. Read the article completely and edit it. I will explain completely how to create an attractive and colourful photo editing by adding your name and 2025 to your photo.
You need to gather some images for this photo editing.
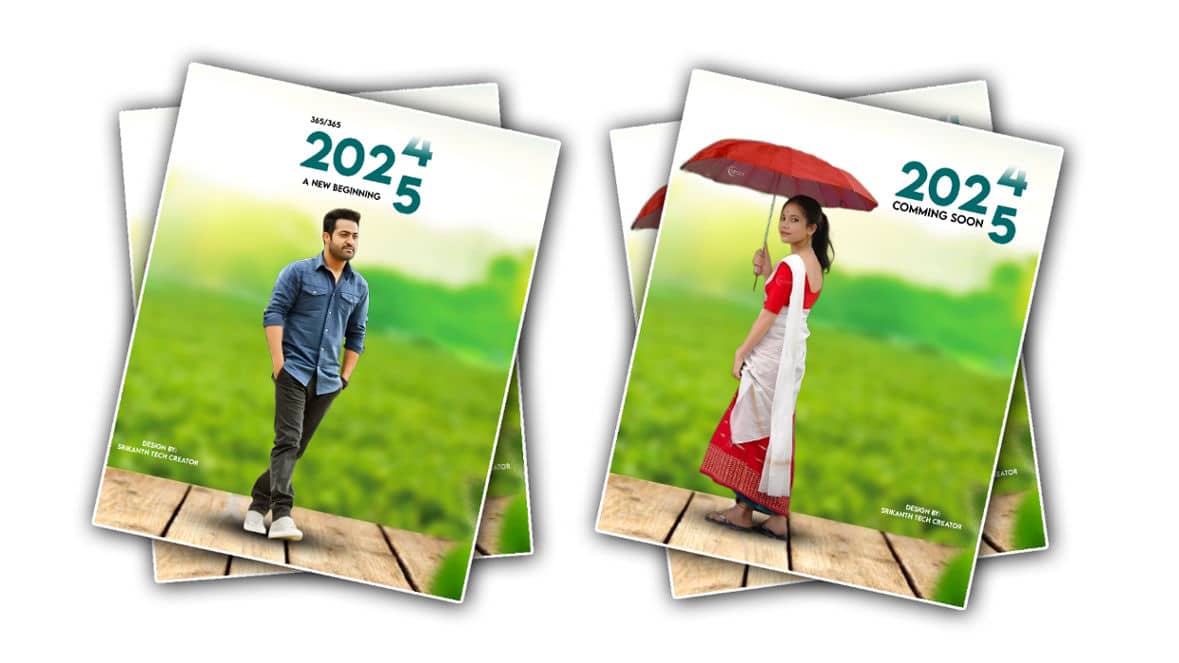
- Greencolourr background photo
- Stylish English font style
- Person photo
- Shadow PNG image
- Now we will edit the photo using these. For this photo editing, we will use two applications and edit it. You can also edit in a single application. Alight Motion application is much better for ease and you can edit photos very fast.
- PicsArt application can also edit photos professionally in HD but next time, we do not have the project saving option if you want to save the project fast. If you want to remove the background of the photo then it is possible in this application.
How to remove photo background
- To remove this background you open the PicsArt application on your mobile click on Edit any photo click on the plus icon and select the image from the gallery now if you scroll to the right side at the bottom here you will click on the background option and turn on the internet now the background of your photo will be removed. If it is not completely removed here, you can use the left-side eraser tool at the top and you can manually arrest it with your finger. After arresting in this way, click on the sixth mark at the top on the right side click on the save option and save this photo to your gallery. Also, if you want to convert this photo to HD before saving, after removing the background,
- Click on the crop option and click on the AI option, it will highlight the pixels or photo of this photo and then save this photo to the gallery.
Alight Motion Photo Editing
- Open this application click on the green color place icon enter the project name take the background block select the banner size click on the create option and open the next page. Now here again click on the green color plus icon click on the media option and select the background photo from the galleries.
- After selecting, click on the effect option in this photo click on the add effect and apply the blur effect from the store. Here, set the blur strength to 3 or 4. Now, add the person’s photo on top of this background photo.
- For this, click on the plus icon in the screen colour click on the media option click on the photo from the gallery that you have previously removed the background from and add it. Set this photo to a small size in the centre and leave space at the top.
- Now, apply another layer again. For this, click on the plus second click on the gallery option select the shadow PNG imaging from the gallery and add it. Set this shadow image at the bottom of the person and set it to the background.
- Now, take the text related to Happy New Year. For this, click on the plus icon and click on the text option. Here you Enter 2025, then apply blue colour to this text and apply any font, then take the text you have taken only in capital letters, and set this text vertically in the middle.
- Now add another text or duplicate the same text you have taken and click on the edit any text option and edit this text. Here you can type Happy New Year or you can also write Coming Soon.
- After typing this, reduce the size and apply a different colour to this text or apply blackcolourr and add this text under the text taken in the starting.
- Now if the photo is worshipped, you should completely increase the size of this photo on the left side and set the text you have taken completely on the right side.
- After editing in this way, click on the sixth mark at the top on the right side of the r share option Click on the above and click on the Current PNG as Frame option tap on Export then click on the Save option and save this photo to your gallery Now you need to convert this photo to HD.
- For this, open the PicsArt application again click on the Edit photo select the photo you saved from the gallery then click on the Crop option and click on the AI option when you click on this option, mobile data should be on your mobile. Now this photo will be announced which means it will be converted to HD.
- Instead of a green background photo in the background, you can take the default white background and click on the place in green colour, click on the share option select a rectangular shape that fits this shape to the screen and then click on the colour and feel option and select any colour here or select green colour and
- Now click on this layer click on the effects option and apply the wipe effect. Now in this effect setting, apply feather and crop from the top. For this, you need to use the start option and crop it completely to the bottom. By doing this, we can edit the new background photo. , you can also apply the colour of your choice here. Now you can use this background for another project as well. After creating the background, click on the arrow mark, click on the Current Frame Ice PNG option, click on the Export option, and then click on the Save option. You can save this photo to the gallery. Now you can reuse this photo again. You can easily edit any photo you want. You can also apply other designs to this photo to make it look attractive.
- Apply green leaves or flowers on these corners and apply a blur effect to these PNG images to make the background attractive.
- Photo editing can be done not only in the PicsArt application but also in Alight Motion.
💠 Background Photo Click Here
💠Font Click Here
💠XML Click Here
💠AM Presset ✅ Click Here
Super