Hello Friends Welcome to another article today our article “Digital Naming Ceremony Invitation” video created in the Kinemaster application this topic is going to be very interesting because we will create effects even without kinemaster applications, so I will tell you step by step read till the end and learn completely.
- We need a golden color image to edit this video along with photo bridegroom photos and a nice colorful dark color video or image in the background.
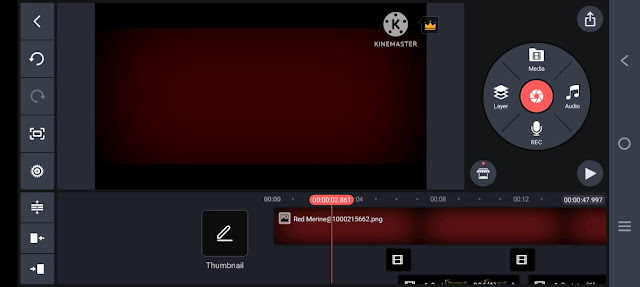
- Now open the Kinemaster application and enter the project name above then select 16:9 ratio and click on Create new Gallery will open for us to add an image or video in dark color now you will see the complete interface. Now click on the same video or image and on the right side we will get some options scroll down we will see the vignette option enable it.
- Now we have to create the required titles for the invitation, for that, we can edit it in Kinemaster, let’s see how.
- Open a new project and take some images or video photos in the same kinemaster now click on the same video and scroll down in the options on the right side you will see an option called background tap on it then there will be a transparent option tap on it and come back now you will see pan and zoom option tap on it in options and tap on equal to move that image or video to left or right now we will see background transparent.
- Now let’s add any title or text for that click on the layer and then take a text suppose house name or sure I take it or bride groom any name take suppose taken apply similarly add color too.
- If created in this way, only normal titles can be edited. Now let’s know about what we thought was a special effect.
- First, add a black screen or black image in the background and whatever you want to create a title on it add that title and add a divider, and place it in the middle horizontally and vertically now apply a golden photo on top of that layer and add it.
- Now it has to zoom in on the photo and make the animation. For that, click on the same golden image and come to the starting point, now take that image on the left side, add a keep frame in the same way, and after reaching the end, move it to the right side, come back again, and now it is not the same, click on the golden layer and on the right side If you scroll down in the options, you will see the blending option, tap on it and select the number of multiply office, now we can see the text, it will convert into golden color.
- Now simply drag the video duration as long as you want to end the video, create as many titles as you want, and put it in the old project.
- Open the project like we took in starting in Kinemaster Now after coming to the add the black skin title that you have created so far here after adding it is not the same now click on the top and if you scroll down on the right side there will be blending options in it select screen or lighting option does it now come back again.
- Now put the same layer again at the starting point and click on the (+) button of the corner on the left side now come to the ending and put it in Zoom and then come to the starting point and zoom out now we will see a very good animation to see it. You can also apply by adding photos in the same way.
Now let’s learn how to add photos to slides.
- First, open the black screen again and add any ink draw footage in white color, now add a photo on top of it, click on that photo, and select Multiplane from the blending options on the right side, now set the photo correctly in the ink drop. Keep track of how long you want the slide to be, and now save this slide in the same way.
- So, we know how to make the same photo text application, do the animation with the photo as well, and edit the entire video as a final.
- Add red wine in cinematic frames like in Kinemaster and track to the end of the video and export the video before adding any music you like, with this the video is ready.
- If you want to use new tricks in the Kinemaster app, you should take the video or photo that you have taken in a slightly dark color. Even if the color is taken, the blur effect should be added to that layer, due to the effect we can see the video look very well. Above these, any particle effect should be applied. When text is added, the text should also be applied. Through these, we will see a new attractive video. You can also do animation for these effects. In the options on the right side, you can use the transform option, and you can animate as you like, while using the ink draft, you need to use the blending options. There are many options in these blending options, mainly screen and lighting multiples are used to set the background of the photo perfectly.
- Even after the video editing is complete, you need to add cinematic frames. For these cinematic frames, you will have effects and cinematic frames by default in this app store. These should be installed first. You should be on the internet while installing. Then make a movie and add these frames to the end of the video. Finally, add a piece of music. After that, check the frames from the start to the end of the video and correct all the mistakes. If you check and correct it beforehand you can give a professional look to the video Now click on the share option select high quality set the frame rate as high as possible and tap on export after some time this video will be successfully saved to your gallery any kind of invitation video you like however, this application is very easy for everyone to edit.
💠Photos Videos Click Here
💠Kinemaster Preset Click Here
💠Alight Moton Preset Click Here
If you have any doubts about this article then you can let us know in the comment section below.


.jpeg)
.jpeg)

.jpeg)
.jpeg)


