Introduction to the Annaprashan Ceremony Celebration
The Annaprashan ceremony is a deeply cherished milestone in a baby’s life, symbolising the first intake of solid food and marking healthy growth and blessings for the future. Celebrated with devotion and joy in many Indian families, this beautiful ritual brings together relatives and friends to witness a sacred and emotional moment. In today’s digital age, many parents prefer creating a video invitation instead of traditional printed cards, making it easy to share the joy instantly. A professionally edited Annaprashan ceremony invitation video not only looks modern but also preserves the emotion of the occasion. In this tutorial, you will learn how to create an elegant and professional Annaprashan invitation video using KineMaster simply and practically.
Planning the Theme and Visual Style
Before you start editing in KineMaster, take time to plan the theme and overall mood of your invitation. Annaprashan ceremonies often have traditional and spiritual elements, so you may want to include soft golden tones, temple bells, floral decorations, or cultural motifs in your design. Decide whether you prefer a traditional look with devotional music or a soft baby-themed style with pastel colours and gentle animations. Since this is a sacred ceremony, the tone of your video should feel warm, respectful, and joyful. A clear plan helps youorganisee your ideas and ensures your final video looks cohesive and professionally designed.
Setting Up a New Project in KineMaster
Open KineMaster and create a new project by selecting the appropriate aspect ratio. If you are making the invitation for sharing on platforms like WhatsApp or Instagram, choose the vertical 9:16 format. For YouTube or TV display, you can select the 16:9 ratio. Set the resolution to 1080p for high clarity and smooth playback. Adjust the frame rate to 30 frames per second to maintain smooth transitions. Starting with the correct project settings is important because it directly affects the quality and presentation of your final invitation video.
Designing a Beautiful Traditional Background
The background creates the emotional foundation of your invitation video. In KineMaster, you can import a background image or create one using soft gradient colours. Traditional Annaprashan invitations often include golden textures, floral borders, temple designs, or light decorative patterns. Choose warm shades like cream, gold, maroon, or light yellow to reflect positivity and blessings. Keep the design clean and balanced, avoiding too many elements on one screen. A simple yet elegant background ensures that the text and baby’s photos stand out clearly and attractively.
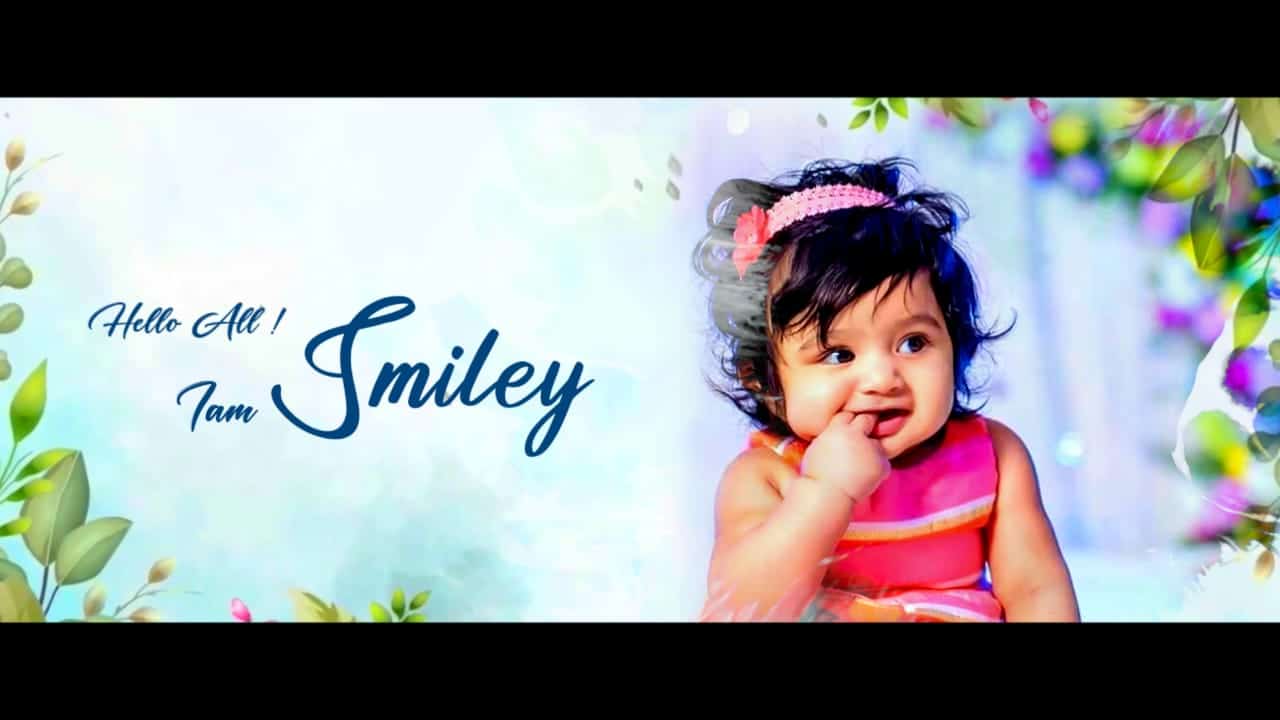
Adding the Baby’s Name as the Main Highlight
The most special part of the invitation is the baby’s name. Use the text tool in KineMaster to type the name carefully, ensuring correct spelling. Choose a stylish yet readable font that matches your theme. Soft script fonts or elegant serif fonts work beautifully for ceremonial events. You can animate the name using fade-in, slide, or gentle zoom effects. Avoid overly flashy animations, as subtle movements enhance professionalism. Adding a light shadow or glow effect behind the text improves visibility and creates a graceful appearance.
Including Ceremony Details Clearly and Elegantly
After presenting the baby’s name, include the important ceremony details such as the date, time, and venue. Arrange this information in separate scenes to avoid overcrowding the screen. Keep the textcentredd and properly spaced for easy reading. Use consistent font styles and colours throughout the video for a unified look. Ensure that each detail remains visible long enough for viewers to read comfortably. Clear communication of information is essential because the main purpose of the video is to invite guests respectfully.
Adding Baby Photos or Short Video Clips
To make the invitation more personal and emotional, include a few high-quality photos or short clips of your baby. Choose images with good lighting and clarity. Place them gently into the timeline and apply soft transitions between each scene. You can use subtle zoom-in effects to create movement within still photos. Avoid overusing transitions, as too many effects can distract from the content. A few carefully selected visuals are enough to add warmth and charm to your invitation.
Enhancing the Invitation with Soft Background Music
Music adds emotional depth and makes your video more engaging. For an Annaprashan ceremony, you can choose a light devotional instrumental, soft classical music, or a gentle baby-themed melody. Import the audio file into KineMaster and adjust the volume so it complements the visuals without overpowering them. Sync text transitions or image changes with the rhythm of the music for a cinematic feel. A well-chosen soundtrack enhances the sacred and joyful atmosphere of the ceremony.
Using Smooth Transitions for Professional Flow
Transitions help maintain a smooth flow between different scenes in your video. In KineMaster, you can choose simple fade, dissolve, or cross transitions for an elegant look. Avoid sharp cuts or overly dramatic effects that may disrupt the peaceful tone of the invitation. Consistency in transitions throughout the video gives it a professional finish. When scenes move naturally from one to another, the entire invitation feels thoughtfully crafted and visually pleasing.
Applying Colour Correction for a Polished FinisColouror correction is an important step that many beginners overlook. Adjust brightness, contrast, and saturation slightly to enhance clarity and warmth. A soft golden filter can add a divine glow to the video, reflecting the spiritual nature of the ceremony. Be careful not to over-edit, as heavy filters may distort natural colours. Subtle adjustments are enough to give your invitation a refined and cinematic appearance.
Exporting the Final Video in High Quality
Once your editing is complete, review the entire video carefully. Check for spelling mistakes, alignment issues, or audio mismatches. Make sure all details are correct and clearly visible. When exporting from KineMaster, select the highest possible resolution, preferably 1080p, and choose a high bitrate for better quality. After exporting, watch the video once more to ensure everything appears smooth and professional. High-quality output reflects your effort and dedication.
Sharing the Invitation with Family and Friends
Finalising your Annaprashan ceremony invitation video, share it easily through messaging apps or social media platforms. Digital invitations allow quick distribution and instant responses from guests. Send the video well in advance so relatives and friends can plan to attend the ceremony. A beautifully edited invitation creates excitement and sets a positive tone for the celebration.
Final Thoughts on Creating a Professional Annaprashan Invitation
Creating a professional Annaprashan ceremony invitation in KineMaster is a rewarding and creative experience. With thoughtful planning, elegant design, soft music, and smooth transitions, you can craft a meaningful video that reflects the sacredness of the occasion. Focus on clarity, balance, and emotional warmth throughout the editing process. When done with care and attention to detail, your digital invitation will not only invite guests but also become a treasured memory of your baby’s special milestone.