In this article, I will explain to you step by step how to create the best birthday wishes reel with your name on it.
What do you need to edit this video?
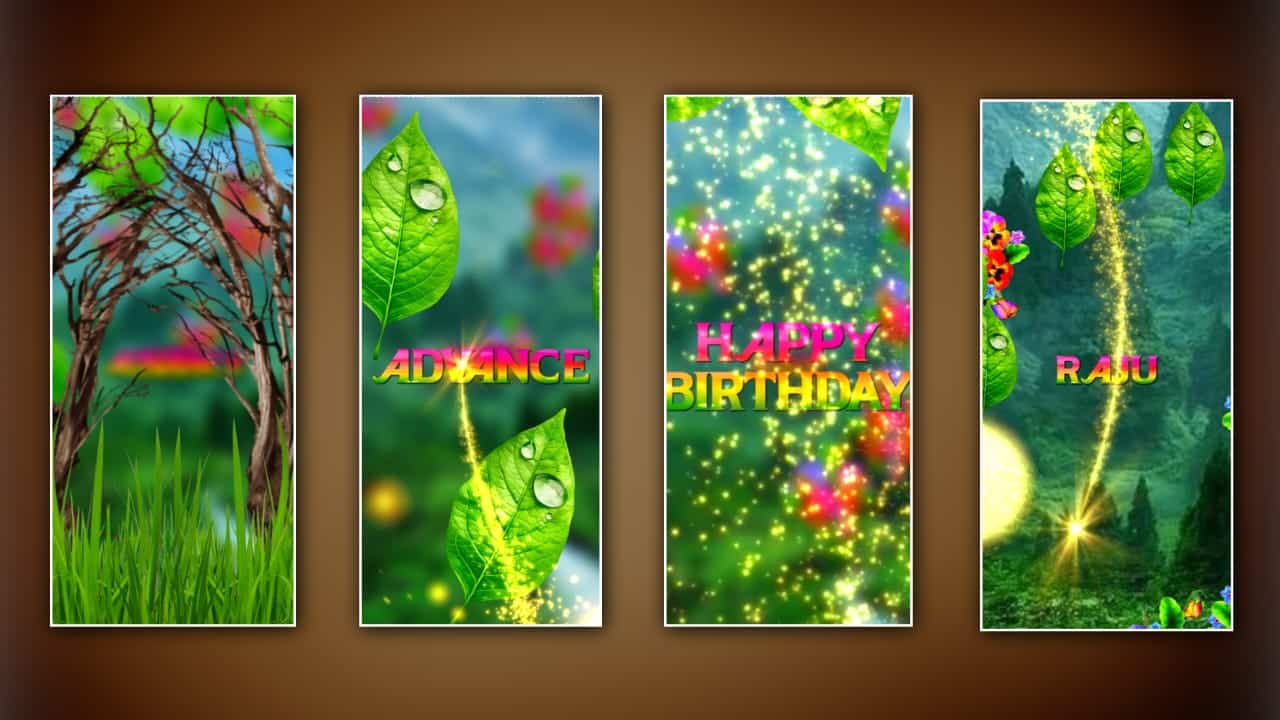
- Green leaf PNG image,
- Nature background photo,
- Golden Particle Video,
- Pink and blue flower PNG image,
- Tree without leaves PNG image,
- Stylish English font style,
- Grass PNG image,
- Make sure the alight motion application is installed on your mobile.
- First, you open the Alight Motion application. Click on the plus icon in green color click on the media option select a natural background photo from your gallery and add it. Add this image for 15 seconds.

- Also, click on this image layer click on the move and transform option click on the ‘Z’ axis, and take 5000

- Now click on the plus icon and click on the text option here you have to take three texts in advance, Second One Happy Birthday, and Third ‘Your Name’ After taking three text layers like this you have to add these layers for 15 seconds, and you have to select each layer and apply font style to it. For this font style, you have to click on this text layer and click on the edit text option. In the font options above, you have to add the font first, select it add it, and apply a colorful image to the text color you have taken, you click on a text layer, click on the color and fill option on the left side, then on the right side If you click on the media option and select colorful imaging from your gallery, here that image will change into this text, and you have three more options to adjust the text properly, use these options and adjust it.

- The ‘Z’ axis should also be applied to these layers. 1000 for Advance Text, 2500 for happy birthday text, and 5000 per text of your name, This is why you should take it

- Now click on the plus icon in green color click on the media option and select an image from your gallery like a tree PNG image without leaves and add it. Use and adjust properly in the center.

- Also, one more image should be added, for this image grass green PNC image click on the plus icon click on the media option select the grass green image from the gallery, and add this image for four or six seconds this image should be set at the bottom center. For this, move and transform option should be used and adjusted.

- Then click on the plus icon click on the media option select the pink and blue PNC flower image from your gallery and add this image for 15 seconds.

- Also, click on this layer click on the move and transform option, and set the axis to 5000.

- Then click on the same layer click on the effects option click on add effect and select scatter repeat effect Use these options to animate this PNG image i.e. move from bottom to top or move from top to bottom in slow motion.

- Click on the plus icon in green color click on the media option and add the green leaf PNG image from your gallery add this image for three seconds and edit this image i.e. this PNG image layer by copying and duplicating it repeatedly. In addition to this, click on this layer and go to this layer. The ‘Z’ axis should be set to 1000

- It should also add saturation and scatter repeat effects to the PNG image.

- Now click on the plus button from the starting point Click on the media option and add a golden color particle effect video from your gallery This video should be added only up to seven seconds click on this video layer click on the moo and transform option and click on the rotate option It should be rotated 90 degrees. Now adjust this layer to the right center. Now, the z-axis should be set at 1000.

- Finally, the camera should also be added. For this, click on the plus icon in green color click on the elements option select the camera option, and add this camera for 15 seconds.

- Then you have to animate this camera by adding keyframes every time you take as many text layers as you want

- But all the layers you have taken so far have set all the effects and animations, so you can edit them very easily for the next slides, for this, you have to copy all the layers in one slide and paste them to the next slides and replace or edit them.

- In this instead of using the camera layer we can use the null option and edit it also after creating a group we can animate this group player otherwise if we do this we will reduce media quality video quality so if you use this null option and do animation only it is best for you The result will come, and you can also edit it very easily using the Gaussian blur effect for all layers without adding any z-axis as you have added so far. Add a nice love BGM to your edited video then click on the export option and select high quality if it is 1080p or higher select 30 to 60fps and click on the export option then the export will start and after completion, the save option will appear. If you click on the save option, this video will be saved to your gallery, but before you save the video, you need to check the video that you have edited so far from the start to the end, because you have added effects, animations, elements, etc. Double-checking for correctness will not only give your edited video a professional look but will also ensure that the video is of high quality.

- In this, you have taken a background nature photo in the starting, but not for 15 seconds, you can also divide and add that photo as a part. You can reply by using font styles, and also you can use the styles you like. Select only attractive font or type only in capitals. By doing this, this video will look colorful and attractive. What are the common mistakes made by many people?
- Not taking high-quality photos or videos, not being able to set the animation at the right time, adding elements but not being able to do it properly in editing, not being able to set it in high quality while saving the video, and making small mistakes like reducing the frame rate, the video is saved completely in low quality.
💠 Photos & Videos Click Here
💠Beat Mark XML Click Here
💠Beat Mark Preset Click Here
💠Camera XML Click Here
💠Camera Preset Click Here
💠Font Click Here
HAPPY BIRTHDAY KAVERI